A GitHub account is required to follow along with this tutorial. NPM and node.js version 14.4 must be installed globally. This was developed on a mac book pro.
Description
This tutorial will show you how to deploy create-next-app to Netlify. I will also describe how to add an Environment key to the Netlify backend and how to use it in the app.
Initialize an app with create-next-app.
Open the terminal then type cd desktop and then type the command npx create-next-app. Then you will be prompted to give a name to your project. The project folder will be on your desktop, open the project with Visual Studio Code (free code editor).
Set up Env Key in the app
At the top of pages/index.js under this line import styles from '../styles/Home.module.css' add this line const myKey = process.env.NEXT_PUBLIC_KEY. The key will be added securely to Netlify config settings after we deploy the app, which I’ll explain how to do below.
App package.json & Netlify settings
On line 9 of the package.json file inside the scripts: attribute I need to add this build command "export": "next export". And I add a netlify.toml file to the root of the app with these two lines added to it command = "npm run build && npm run export" publish = "out".
Push app to GitHub
Push these changes to the main branch of your GitHub repo. If this is not an existing create-next-app the app needs to be pushed to a new repository on Github.
Authorize Netlify
After pushing this app to GitHub I go to https://www.netlify.com/ and click sign up. From the signup page, I use my GitHub account to sign up. I will deploy this app straight from the GitHub repo so I will need to authorize Netlify to have read access to the repository that I pushed the code to.
Netlify Build Settings
To get started with the Netlify deploy sign in and go to https://app.netlify.com/start. There is a 3 step process to deploy.
1. Connect to git provider, in this example I clicked GitHub.
2. Pick Repository, click the name of the repo that has the code.
3. Site settings and deploy.
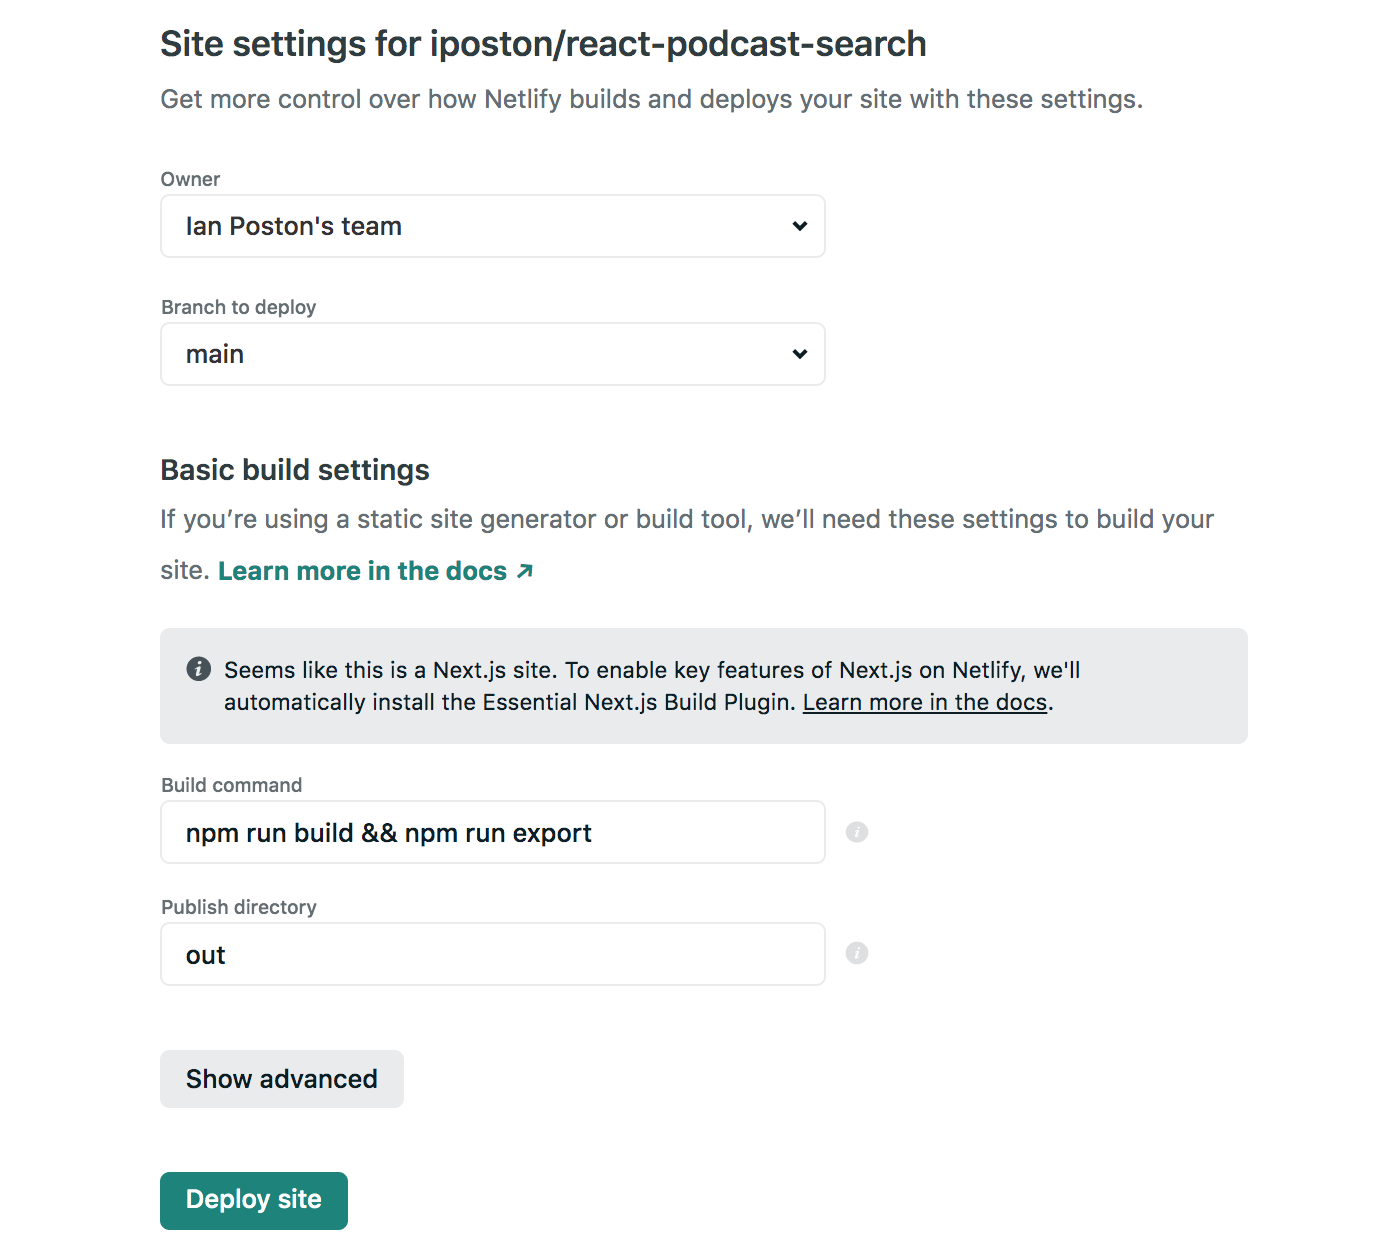
In Step 3 There are 4 settings to consider before deploy. The owner name will be auto-filled with the team name that was used when the Netlify account was set up and the 2nd setting is the branch name that I deployed from which will be main. Through some trial and error and with some helpful comments from Netlify users I had to add this build command to the settings npm run build && npm run export and the last setting type out for the Publish directory. Then click the Deploy site button.
Set up Env Key in Netlify config settings
After deploying to Netlify from the top of the page navigation menu click Site Overview then just below click the Site settings button. On the left side there is a vertical menu click Build & deploy option then click Environment option from the same menu and click edit variables button and add key: NEXT_PUBLIC_KEY value: your key and click Save. Go to the site URL and you’re all good to test your app. Each time there is a push of changes to the main branch of your repository Netlify will deploy automatically. Thank you for reading!
Here’s an example of a create-next-app I that I deployed to Netlify via github. Demo
